Rackmounting my Gaming PC
From Desktop to 4U: The Conversion
As my homelab began to grow, I realized that my scattered approach—having a NAS here, a Raspberry Pi there, and my main home server—was becoming unsustainable. I wanted to consolidate everything into a single, organized server rack. Since I already had the NAS built (see Building My NAS), placing it on top of a new rack (see Home Server Rack) was the natural next step. This also aligns with my plan to eventually transition my main home server into a 2U chassis, which was another major driver behind getting the rack now.
The project coincided with a realization that my 2018 gaming setup needed to evolve. With newer AAA titles like Battlefield 6 pushing the limits of my current GPU, I knew an upgrade was coming, but I wanted to use this opportunity to transition the entire system into a rackmount form factor. It was the perfect time to learn the ropes of rackmount PC building while simultaneously expanding my lab.
The Hardware
The goal was to take my existing ATX components and fit them into a professional 4U chassis.
- CPU: AMD Ryzen 9 5900X
- GPU: NVIDIA RTX 3070 Ti
- RAM: 64GB DDR4-4000 (4x16GB)
- Storage: 2 x 1TB NVMe SSD
- Motherboard: Asus ROG STRIX B550-F GAMING WIFI ATX AM4
- NIC: Onboard 2.5GbE and Dual SFP+ Mellanox ConnectX-3
- Case: Sliger CX4170a (4U)
I used a Sliger chassis, included rails, and Noctua fans to ensure everything was as robust as possible for a long-term solution.
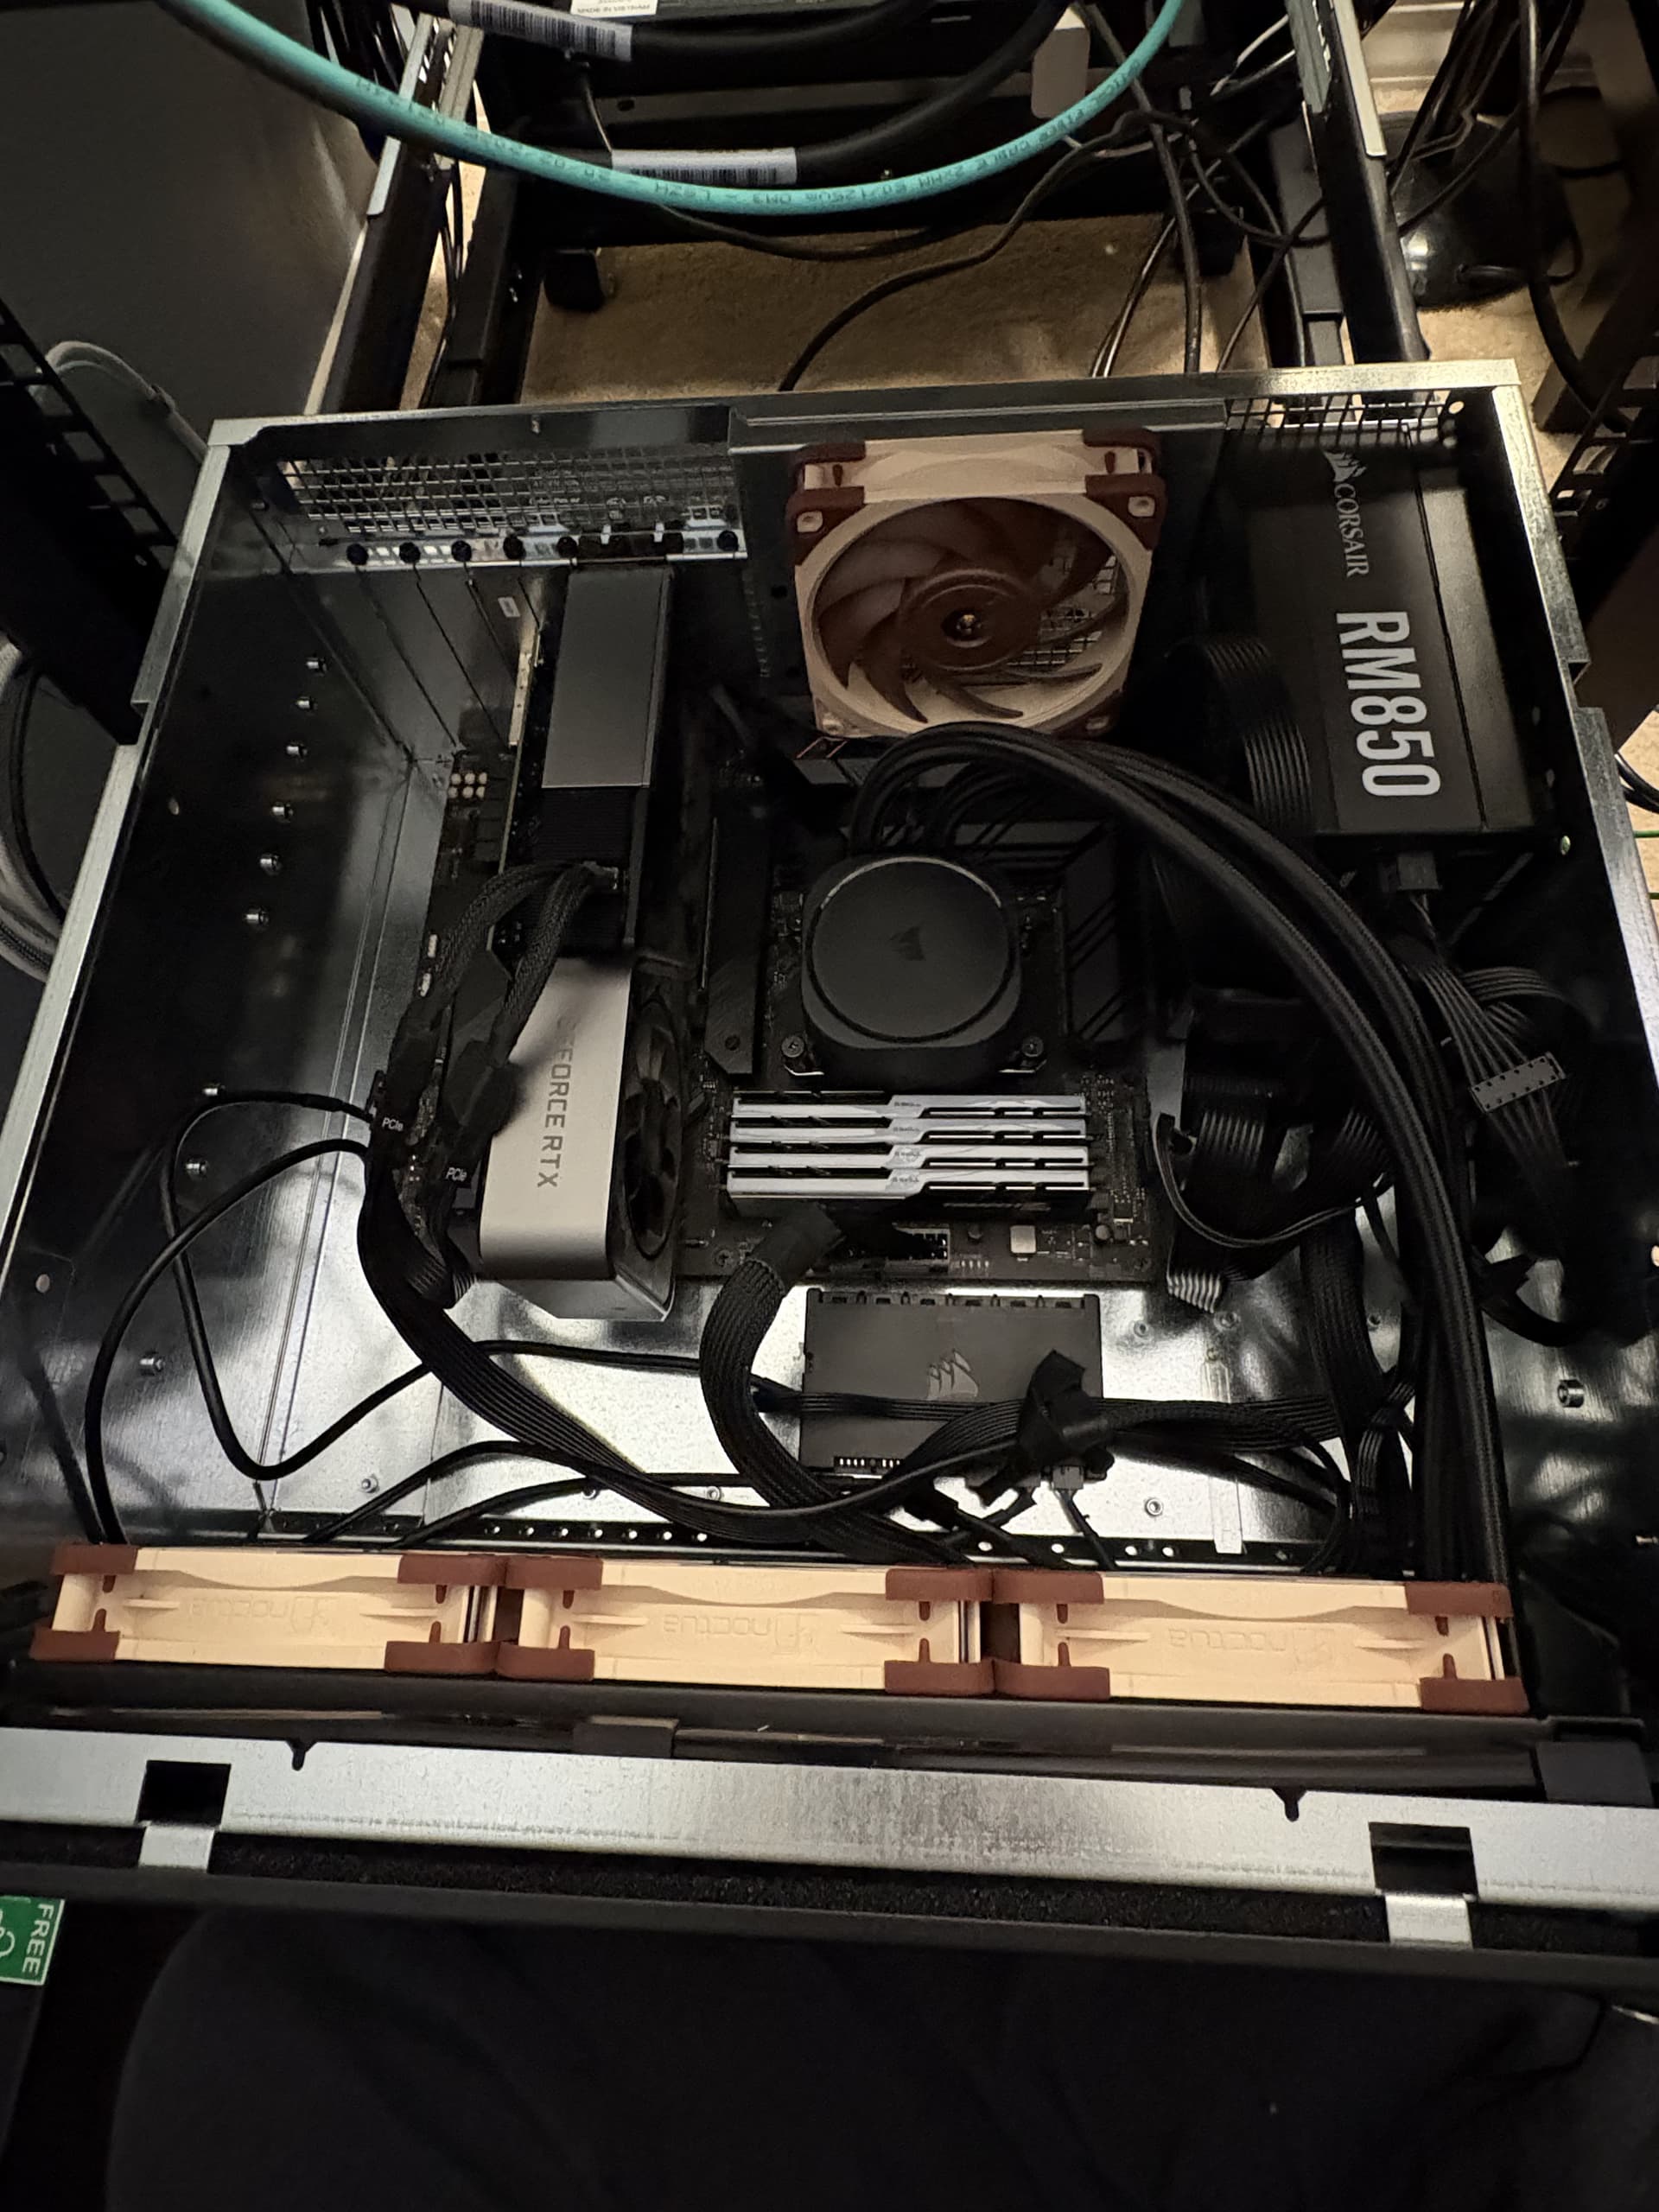 The completed 4U node in the rack
Complications
As with any homelab build, this wasn't without its janky engineering solutions:
- The AIO Clearance Disaster
- I made the mistake of not buying the specific AIO that Sliger offers for this case. Instead, I tried to use a used 360mm Corsair AIO I purchased from Amazon. Even though the specs suggested the length was identical to the Sliger version, it was off by just a few millimeters.
- To make it fit, I had to remove the front panel connectors (USB-A and USB-C) entirely because their plastic housing collided with the AIO.
- The clearance issue was so tight that the mounting plate for the front I/O had to be flipped upside down and angled, leaving a small gap for the power button in the space intended for the USB connectors. Because the plate could only be secured by a single screw in this position, I ended up using Velcro strips to wrap around the middle connector (the splitter between the power button and the I/O) and strap it to the case. It's not pretty, but it works!
Notes
Role and Management:
- This machine now serves as a powerful Proxmox VE node. It hosts various virtual machines, including specialized Windows desktops for work, testing/self-learning environments, and even gaming VMs.
- To save on electricity costs, I have the server turned off. When I need to access it, the node is powered on via Wake-on-LAN (WoL) and is shut down manually via SSH or the Proxmox web UI.
The Network Evolution (and the floor-space problem):
- Initially, I placed the rack in my bedroom to create a 10Gb "island" (the rest of my home network connection is 2.5Gb). By connecting my desktop, NAS, and this compute node to a core switch, I had a blazing-fast 10Gb connection between all primary devices.
- In the winter, this was fantastic—the server acted as a free space heater for the room. The NAS was generally quiet, though the sound of heavy writes or scheduled jobs was definitely noticeable.
- I use a portable AC in the summer. Once summer hit, I knew I would face a dilemma: with the limited floor space, both the AC and rack cannot comfortably fit in the same bedroom. I had to choose between comfort and a high-speed connection between my homelab and desktop PC.
- As a result, I moved the rack to a dedicated room. This meant compromising the 10Gb "island" for a 2.5Gb connection through the walls via an upstream UniFi switch. While I lost some peak throughput between the desktop and NAS, the ability to use my air conditioner in the summer is well worth it.
Conclusion
The conversion was a success, even if it required some emergency velcro action. Moving from a desktop setup to a consolidated rack has changed how I interact with my lab; making it more professional and much easier to manage as I continue to add more hardware and equipment.
For a detailed view of all software and hardware in my lab, visit the GitHub Repo.